git --versionGit and GitHub
Keywords
Productivity Tools
Goal for the day
- Create a repository
- push something to the repository
- connect RStudio to GitHub
Do you have git?
Before we start:
- Make sure you have Git installed.
- Open a terminal and type:
If not installed
- on a Mac, follow the instructions after typing the above.
- on Windows follow these instructions
Motivation
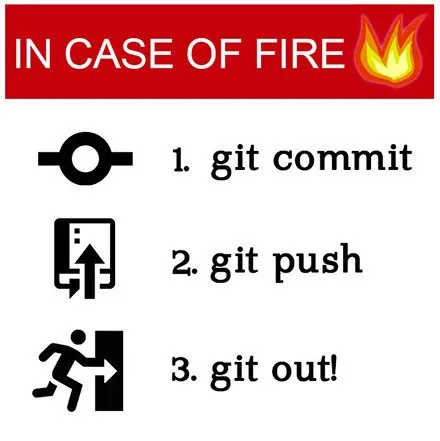
We want to avoid this:

Motivation
This is particularly true when more than one person is collaborating and editing the file.
Even more important when there are multiple files, as there is in software development, and to some extend data analysis.
Motivation
- Git is a version control system that provides a systematic approach to keeping versions of files.

Motivation
But we have to learn some things.

Note
In these notes, I use < > to denote a placeholder. So if I say <filename> what you eventually type is the filename you want to use, without the < >
Why use Git and GitHub?
Sharing.
Collaborating.
Version control.
We focus on the sharing aspects of Git and GitHub, but introduce some of the basics that permit you to collaborate and use version control.
What is Git?
What is GitHub?
Described a social network for software developers.
Basically, it’s a service that hosts the remote repository (repo) on the web.
This facilitates collaboration and sharing greatly.
What is GitHub?
There many other features such as
- Recognition system: reward, badges and stars.
- You can host web pages, like the class notes for example.
- Permits contributions via forks and pull requests.
- Issue tracking
- Automation tools.
What is GitHub?
The main tool behind GitHub is Git.
Similar to how the main tool behind RStudio is R.
GitHub accounts
Pick a professional sounding name.
Consider adding a profile
README.md.Instructions are here.
Example here.
Repositories
We are ready to create a GitHub repository (repo).
You will have at least two copies of your code: one on your computer and one on GitHub.
If you add collaborators to this repo, then each will have a copy on their computer.
The GitHub copy is considered the main (previously called master) copy that everybody syncs to.
Git will help you keep all the different copies synced.
Repositories
Let’s go make one on GitHub…
Then create a directory on your computer, this will be the local repo, and connect it to the Github repository.
First copy and paste the location of your git repository. It should look something like this:
https://github.com/your-username/your-repo-name.gitConnect Git and GitHub
When accessing GitHub you need credentials to verify your identity.
There are two ways to connect: HTTPS or SSH, each requiring different credentials.
We recommend using HTTPS, which uses a Personal Access Token (PAT).
Note that your GitHub website password isn’t your access token.
Connect Git and GitHub
Detailed instructions are here.
Carefully follow the instructions provided by GitHub.
When setting permissions for the token, choose non-expiring and select the repo option in the scopes section.
Once you complete these steps, GitHub will display your token—a lengthy string of characters.
Immediately copy this token to your clipboard. This is the only time GitHub will show it to you.
Generate a token:
For security, save this token in a password manager. This ensures you can access it if needed later on.
When git prompts you to enter your password, paste the token you’ve copied. After this, password prompts should no longer appear.
If you ever need the token again, retrieve it from your password manager.
More details available from Happy Git and GitHub for the use.
Connect Git and GitHub
The next step is to let Git know who we are on Github.
To to this type the following two commands in our terminal window:
git config --global user.name "Your Name"
git config --global user.mail "your@email.com"
Connect Git and GitHub
This will change the Git configuration in way that anytime you use Git, it will know this information.
Note that you need to use the email account that you used to open your GitHub account.
Connect Git and GitHub
To connect working directory to the GitHub repo
- initialize the directory:
git init- Let Git know what is the remote repository.
git remote add origin <remote-url>Now the two are connected.
Note
origin is a nickname we will use for the remote. We can call it something else, but everybody calls it origin so best to stick with that.
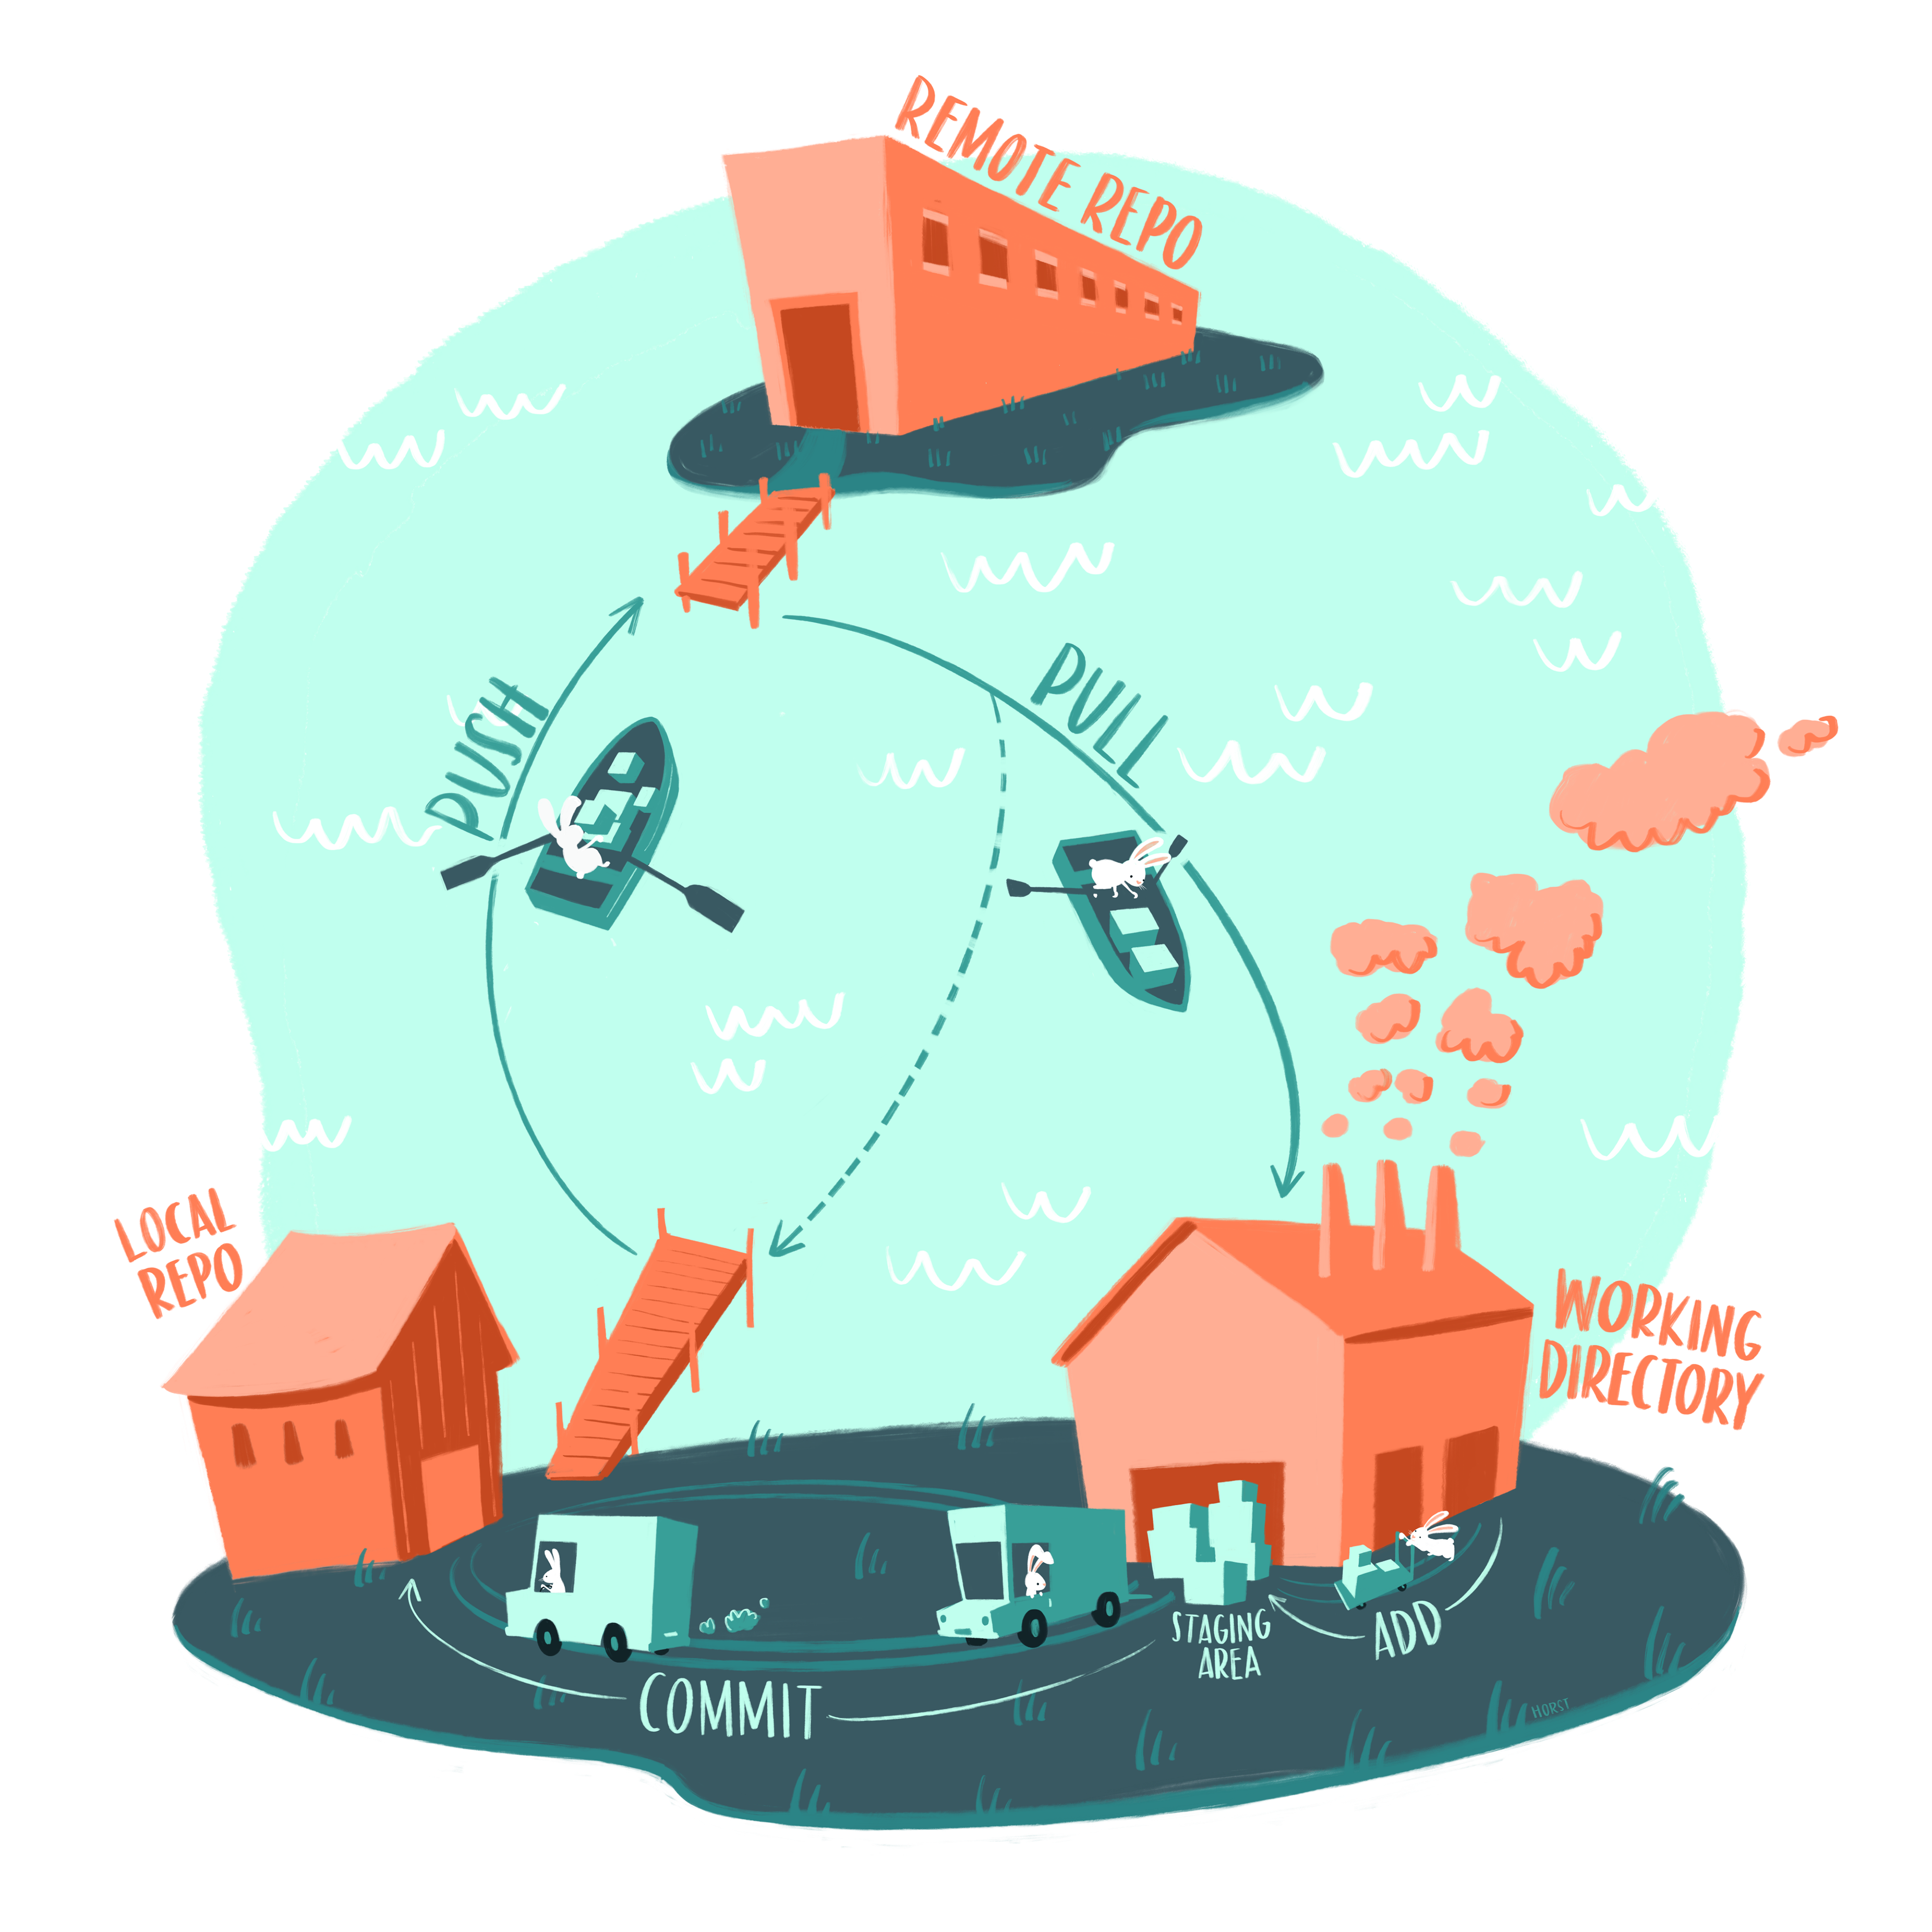
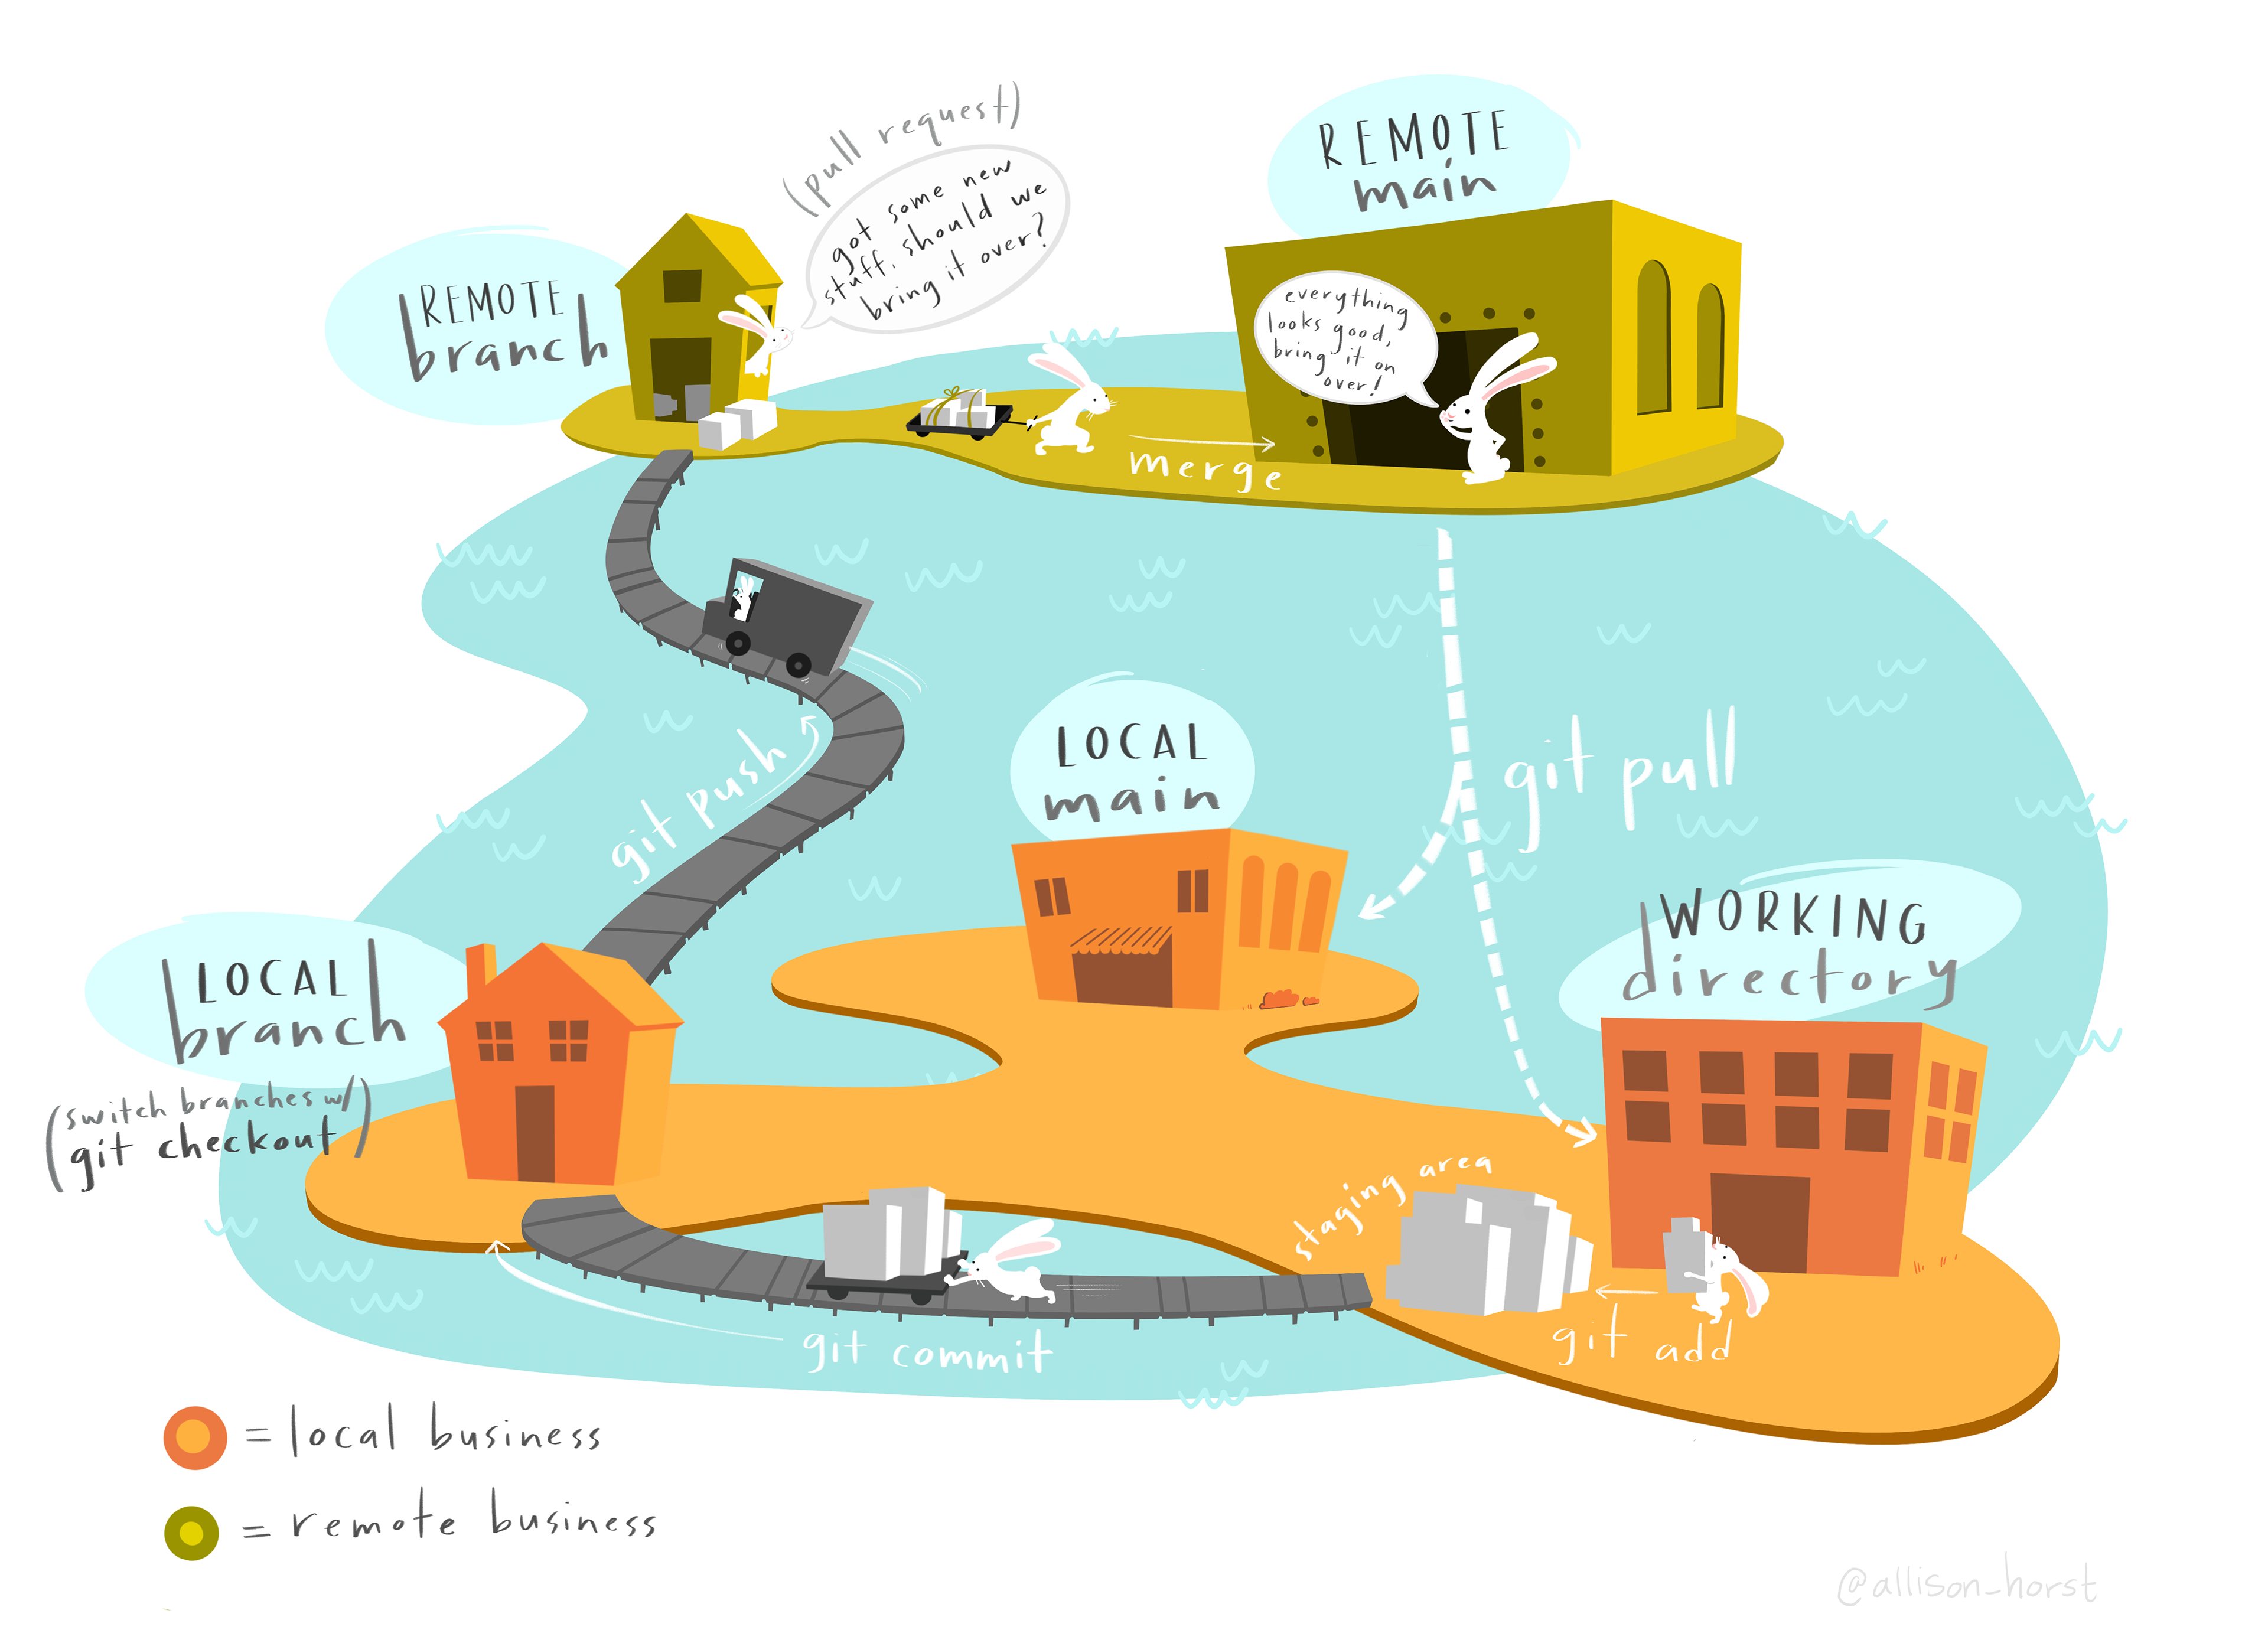
Overview of Git
The main actions in Git are to:
- pull changes from the remote repo.
- add files, or as we say in the Git lingo stage files.
- commit changes to the local repo.
- push changes to the remote repo.
The four areas of Git

Status

git status filenameAdd
Use git add to put file to staging area.
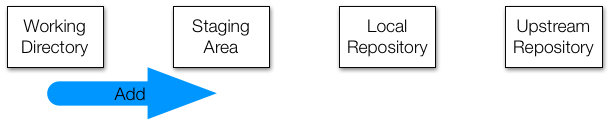
git add <filename>We say that this file has been staged. Check to see what happened:
git status <filename>Commit
- To move all the staged files to the local repository we use
git commit.
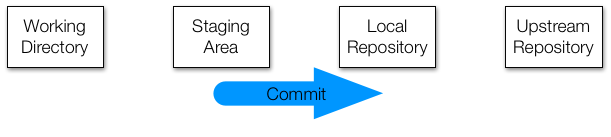
git commit -m "must add comment"Once committed the files are tracked and a copy of this version is kept going forward.
This is like adding
V1to your filename.
Commit
Note
You can commit files directly without using add by explicitely writing the files at the end of the commit:
git commit -m "must add comment" <filename>Push
- To move to upstream repo we use
git push
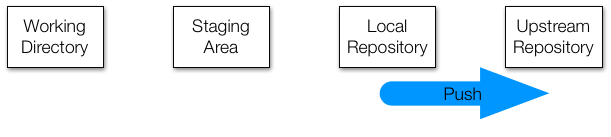
git push -u origin mainThe
-uflag sets the upstream repo.By using this flag, going forward you can simply use
git pushto push changes.So going forward we can just type:
git pushPush
When using
git pushwe need to be careful as if collaborating this will affect the work of others.It might also create a
conflict.

Fetch
- To update our local repository to the remote one we use
git fetch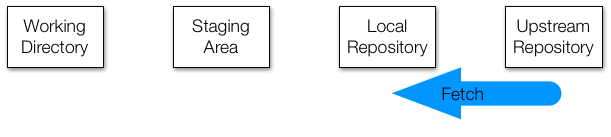
Merge
- Once we are sure this is good, we can merge with our local files:
git merge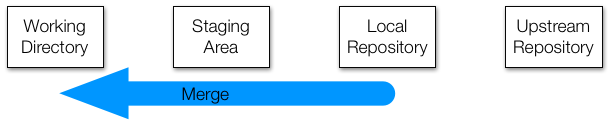
Pull
I rarely use fetch and merge and instead use pull which does both of these in one step
git pull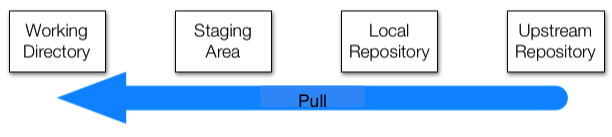
Checkout
- If you want to pull down a specific file you from the remote repo you can use:
git checkout filename- I use this when I make changes but decide I want to go back to original version on remote repo.
Warning
If you have a newer version in your local repository this will create a conflict. It won’t let you do it. If you are sure you want to get rid of your local copy you can remove it and then use checkout.
Checkout
- You can also use
checkoutto obtain older version:
git checkout <commit-id> <filename>- You can get the
commit-ideither on the GitHub webpage or using
git log filenameReset
- What if I commit and realize it was a mistake?
git reset HEAD~1undos the commit and unstages the files, but keeps your local copies. I use this on very often.
There are many wasy of using
get resetand it covers most scenarios.ChatGPT and stackoverflow are great resources to learn more.
Branches
We are just sratching the surface of Git.
One advanced feature to be aware of is that you can have several branches, useful for working in parallel or testing stuff out that might not make the main repo.
Branches
- We wont go over this, but we might need to use these two related commands:
git remote -v
git branch
Clone
Another common command is
git clone.It let’s download an entire repo, including version history.
git clone <repo-url>Using Git in RStudio
Go to file, new project, version control, and follow the instructions.
Then notice the
Gittab in the preferences.

For more memes see Meme Git Compilation by Lulu Ilmaknun